If Thunderbird has been used before then open Thunderbird and select Tools and Then account Setting. click on add account button to add your IAM email account on Thunderbird.
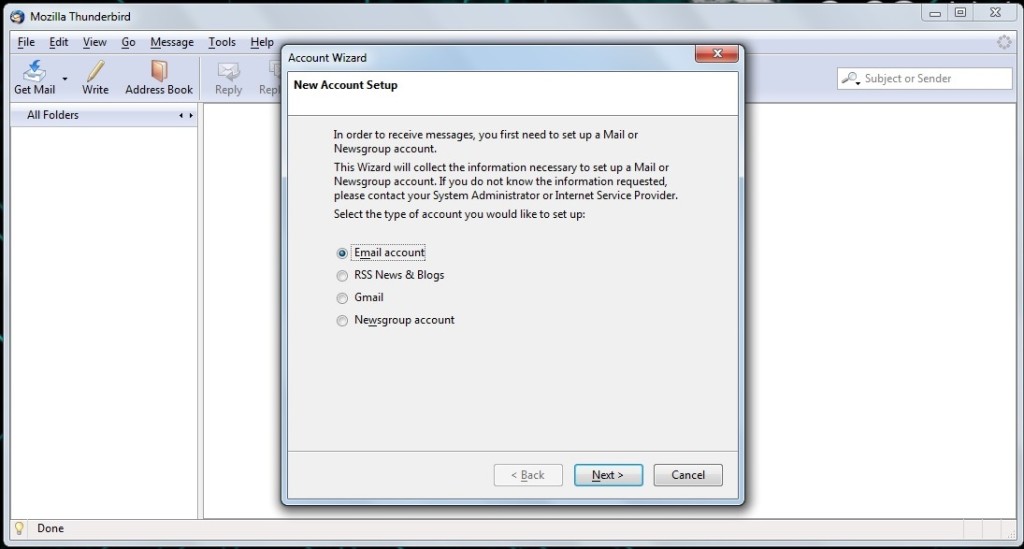
Or if you newly installed Thunderbird on you computer after the installation is finished you will get some message like bellow picture. also you will get this message after clicked on add account button from account setting. in this step just select email account and press next.
Step 2: you should fill the name and email address text box, with your name and IAM email address . and press next.
step 3 : in this step select (POP3) as a incoming mail server and (mail.iam-afghanistan.org) as server name and also use the ( mail.iam-afghanistan.org) as a outgoing server. uncheck the checkbox to store your mail in proper location.
POP3 (incoming mail) server: mail.iam-afghanistan.org
SMTP (outgoing mail) server: mail.iam-afghanistan.org
and press next .
Step 4: Use you full email address as a incoming Username for this step .
step 5 : in this step just show you some information you have been setup on previous window. when this step finished main window of Thunderbird will be appear.
Step 6 : now you should do some more configuration to your email client work correctly . click on Tools and then click on account setting and then server setting . change this option same as the bellow example .
and next window select the first radio button ( Accept this certificate permanently). and then OK .
Step 7 : on the account setting click on the “outgoing server (SMTP)”. and follow the instruction on the picture,
1- select the current profile and then click on edit
2- on the “user secure connection” select “SSL” radio button . ( the blue chart location should be change after you select ssl to port 465 .
it’s finish. now it’s work and you can see all your email in Thunderbird software by clicking on Get mail tap on right top .
Some time you get a message about the certificate just ignore that and press OK .


