In a Mac computer you could use a free version of Thunderbird designed for Mac or any other mail client software which are designed to be used by Mac but A Mac computer already has an application called Mail which we recommend you use for your IAM email. The Mail program should be listed in the application dock list in bottom of the screen or you can find it in Application folder.
In this article I would like to show you how to setup IAM email account in a Mail application in a Mac computer.
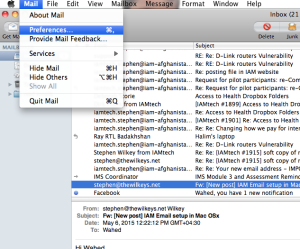
1- Open the Mail program and then click on Mail tab at the top left, then select preferences.
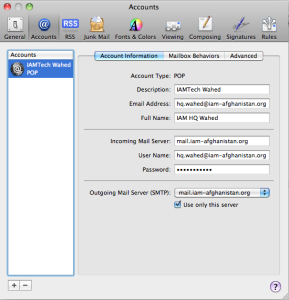
2- An Account window will open up.
Note: I have already setup my account, but for new setup there would not be any account.
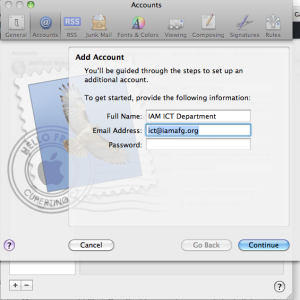
click on Plus (+) icon to add an account. the + icon is on the bottom left side of the account screen.
If it asked for admin password then enter it to allow you to setup a new account.
5- Enter your full name – this is what most people receiving an email from you will see as the sender of the message (it should indicate your name and your role in IAM), Email address and password. And click continue.
I have already a Full Name and Email address but you can enter your own Full name, Email address and password.
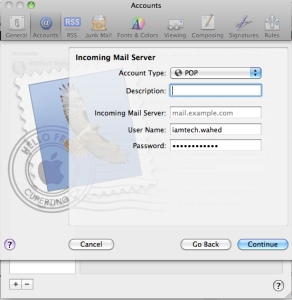
6- An other window will open, Incoming Mail Server.
Account type should be POP, Description should be written like IAM Email its optional, Incoming Mail Server has to be mail.iam-afghanistan.org, User name has to be your full email address including @iam-afghanistan.org and your password. Click continue.
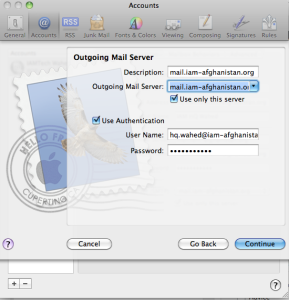
7- An other window will open, Outgoing Mail Server.
Description could be any word you like (IAM server) – this is just for your benefit so it should mean something to you, Outgoing Mail Server has to be mail.iam-afghanistan.org , use only this server has to be checked, Use Authentication has to be checked, User name has to be your full email address including @iam-afghanistan.org and your account’s password. then click continue.
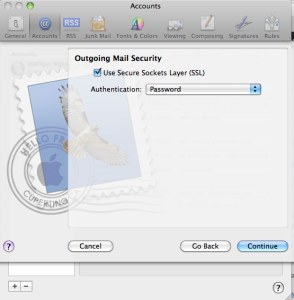
8- If a certificate question appeared click continue. Then an error will occur saying Outgoing Mail Security.
Check Use secure sockets layer( SSL) and leave Authentication as password. click continue.
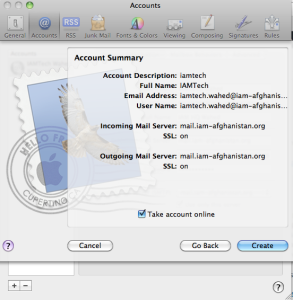
9- An other window will appear.
Click Create.
Now you have created your account and now you should some more settings.
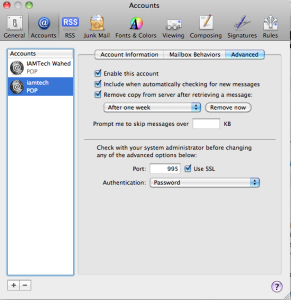
10- Click on the newly created account and then click on Advanced tab.
The following should be already checked, Enable this account, Include when automatically checking for new messages and Remove copy from server after retrieving a message then chose to remove after a period of time or now. The Port has to be 995 for POP and Authentication has to be password.
Now test to send and receive your emails and it should work.

